
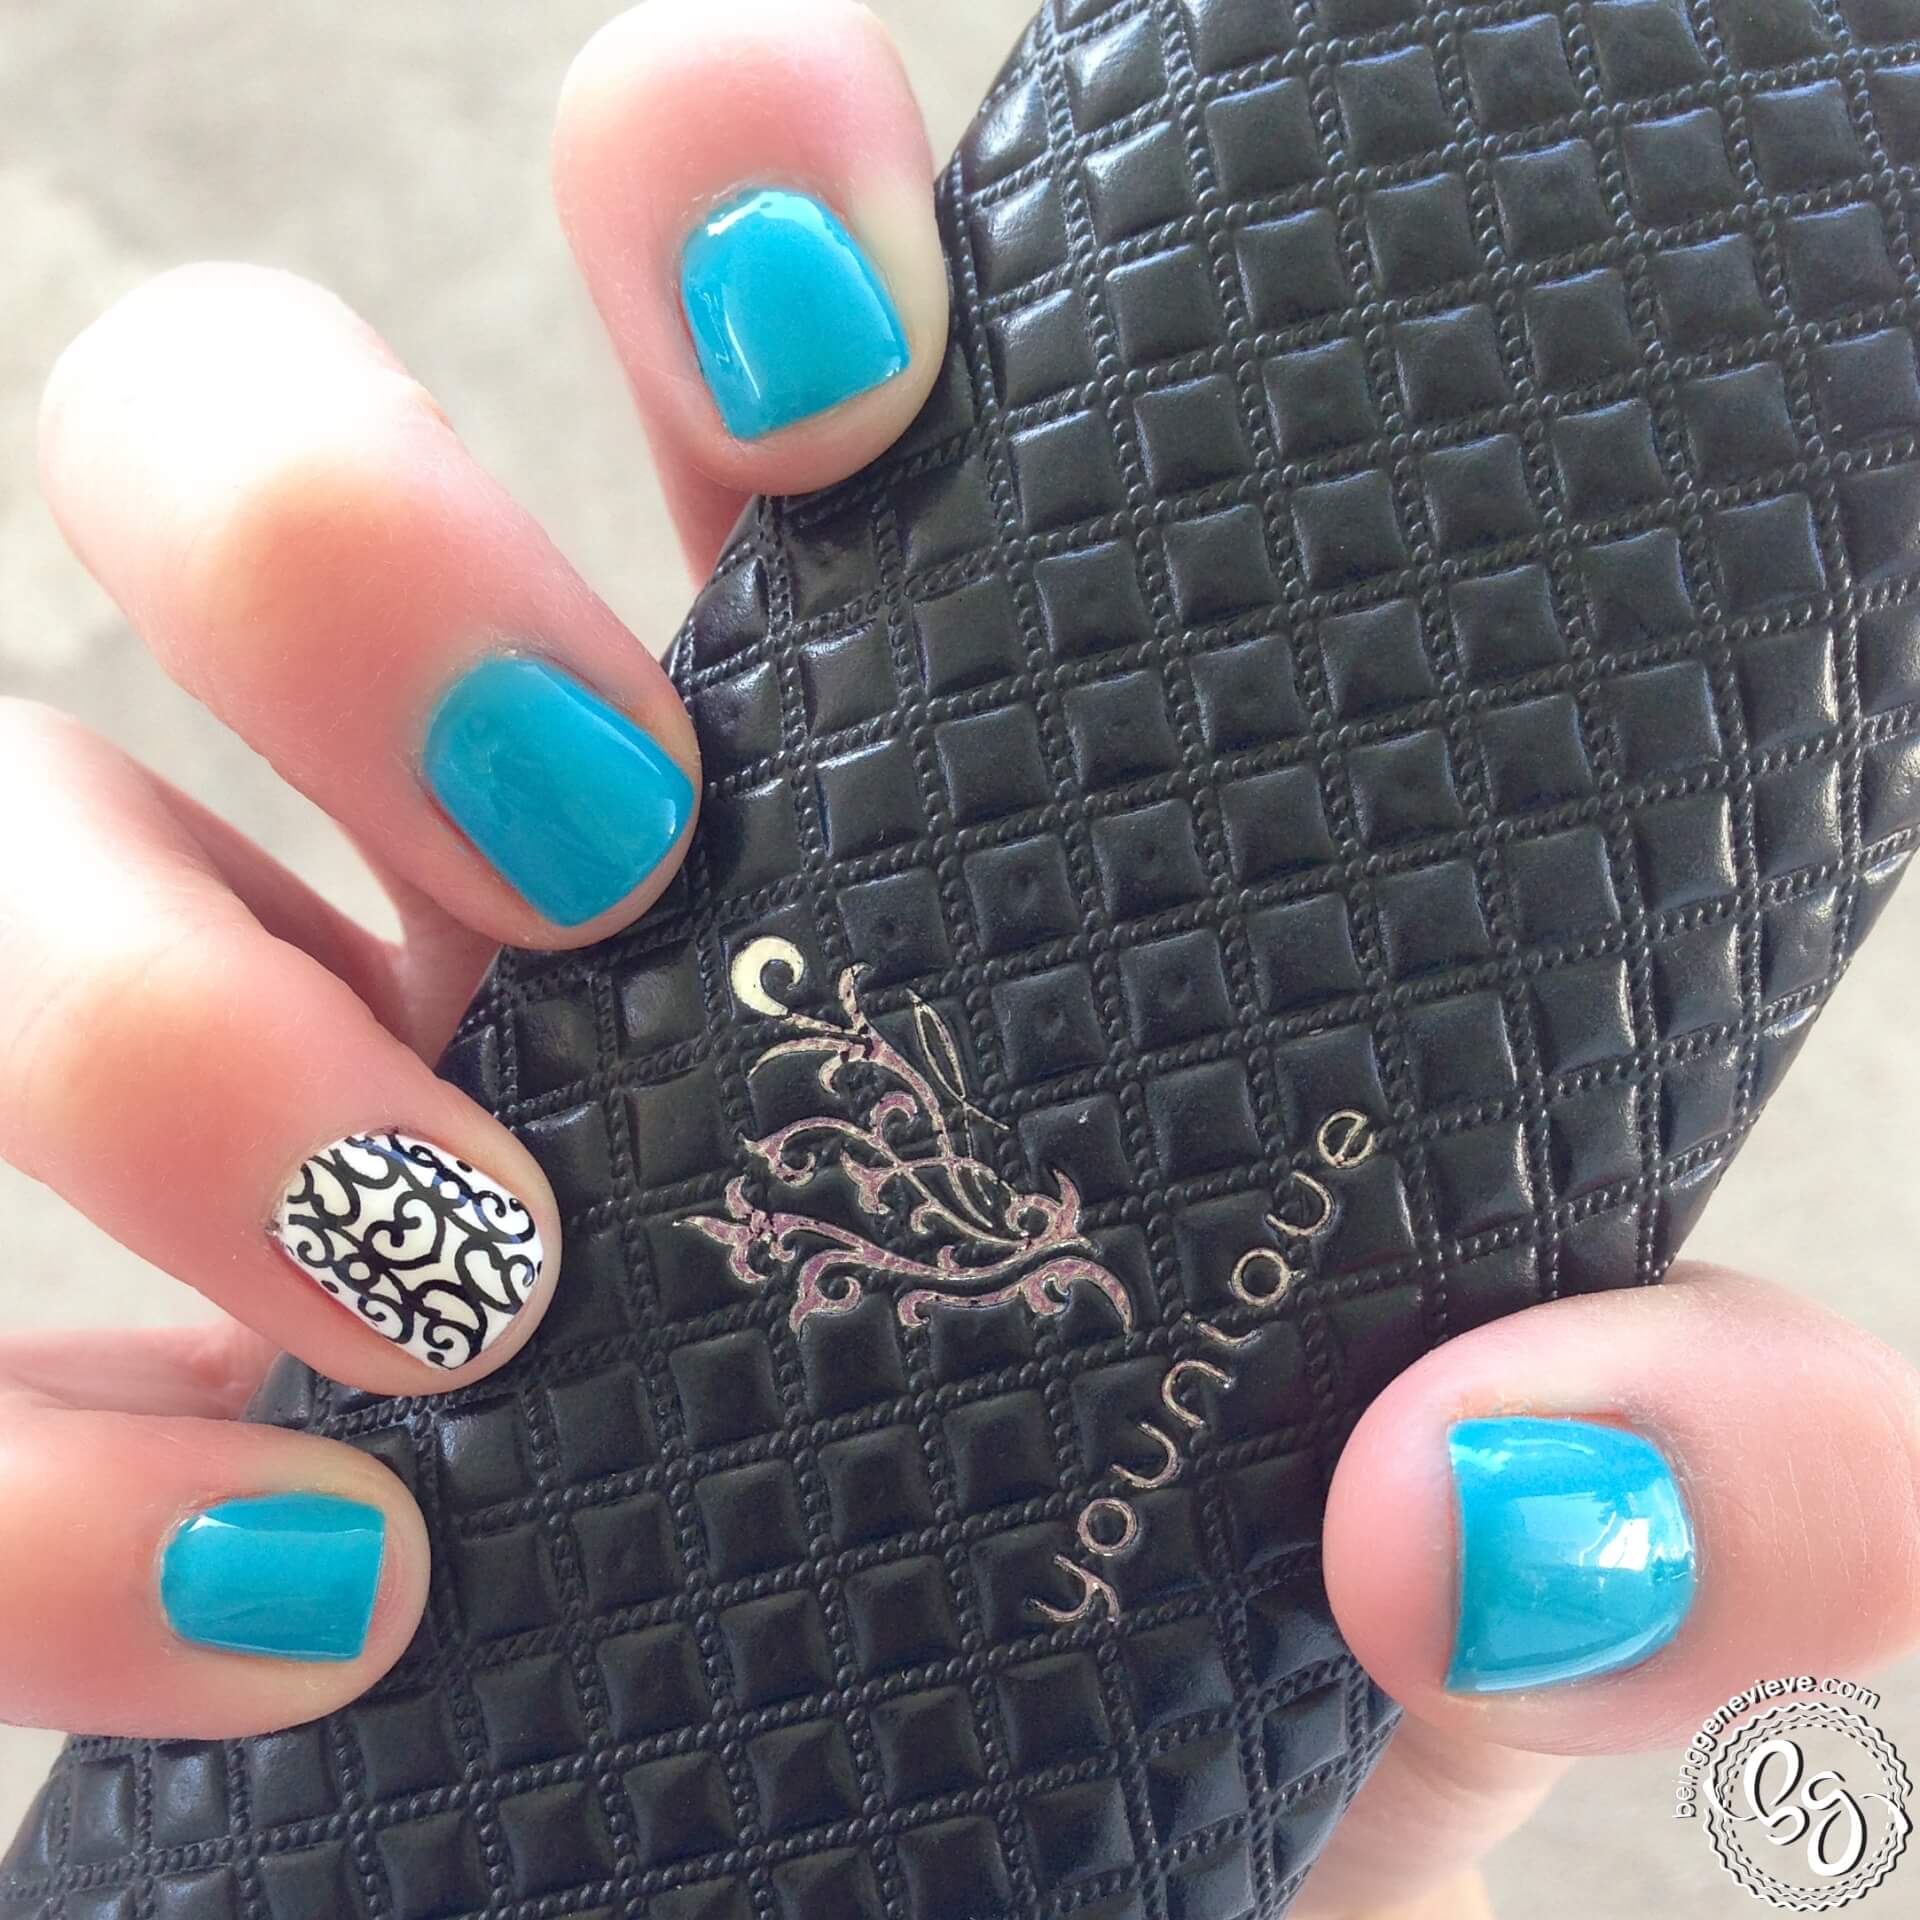
This week, I painted my nails with a bright blue polish and a white ring finger contrasting nail, but couldn’t decide what black design I should pair with the white. I looked around and my eyes caught the design on the front of the Younique 3D mascara case. It is a thin cute curly line. I decided that’s what I would do. Something thin and curly. So here is what I did . . .
Step 1: Prep Nails
View my post on Nail Polish Prep.
Step 2: Paint Teal Nails
Paint all of the nails with two coats of bright teal polish. I used the Shellac color called, Cerulean Sea.
Gel Polish: Apply one coat teal polish and cure in light. Paint second coat and cure 2 minutes in the UV light, or 1 minute in an LED light.
Step 3: Paint White Accent Nails
Paint the ring finger nails with two coats of white polish. I used the Shellac color called, Cream Puff.
Gel Polish: Apply one coat white polish and cure in light. Paint second coat and cure 2 minutes in the UV light, or 1 minute in an LED light.
Step 4: Black Design
Stamp your white ring finger nails with the Bundle Monster plate 206. What is nail stamping? How is it done?

Step 5: Apply Final Top Coat
Now apply your top coat. Make sure the paint is completely dry before adding top coat to help avoid smearing.
Shellac: Apply top coat, only after paint is completely dry, and cure in UV light for 2 minutes.
Step 6: Allow to Dry and Apply Cuticle Oil
Allow your polish to dry completely. Apply a cuticle oil just around your nails on the cuticle and rub into the skin.
Gel Polish: Remove sticky residue on top of nails with a little alcohol or polish remover and apply cuticle oil.


