
There’s nothing more refreshing than a beautiful turquoise blue nail polish, in my opinion. It reminds me of the ocean, my grandmother’s cabin at Bear Lake, swimming, relaxing in a chair while my kids play in the sprinklers, an ice cold drink of water . . . basically summer. What could be more relaxing than summer? There’s family barbecues, water balloon fights, hiking in the mountains, visiting national parks, biking with the family in the cool evenings, picking raspberries . . . I could go on and on with how relaxing and fun summer is to me.
So I have come up with a wonderful nail art design for those fun and relaxing summer months. . . Note: I will be providing instructions on how to achieve this look with plain polish, along with Gel Polish.
Step 1: Prep Nails
View my post on Nail Polish Prep.
Step 2: Paint Nails Turquoise
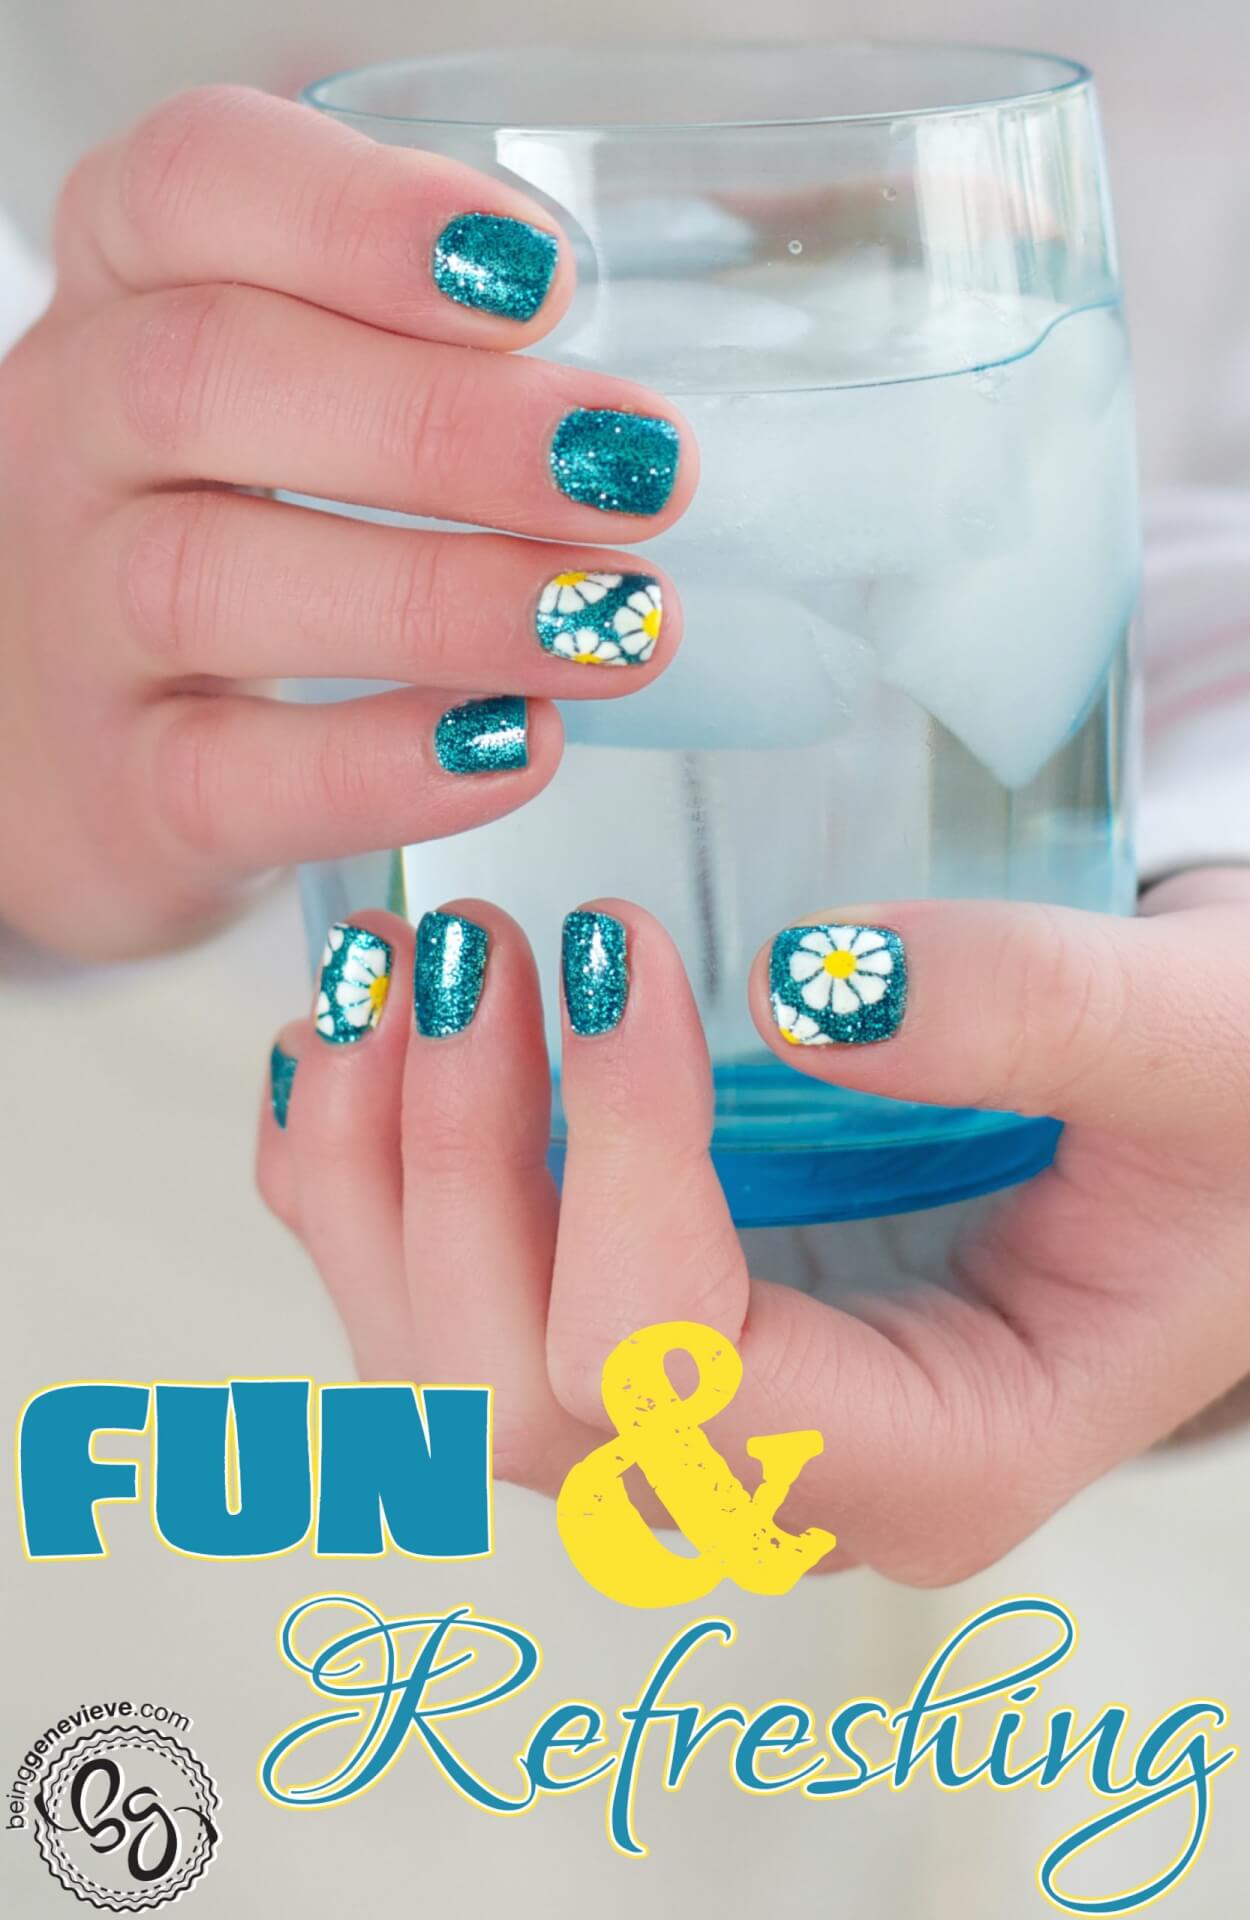
Paint all your nails with two coats of blue/turquoise polish. I used the Gelish color called My Favorite Accessory.
Gel Polish: Apply one coat turquoise polish. Cure 2 minutes in the UV light, or 1 minute in an LED light. Apply second coat of turquoise polish. Cure again for 2 minutes in the UV light, or 1 minute in an LED light.
Step 3: Dust Glitter
While the nail polish is still wet gently dust a fine layer of turquoise glitter to the blue polish, just as I did for my Simply in Love nails. I used Martha Stewart craft glitter, color turquoise.
Shellac: Once polish is cured it will still have that sticky finish on all the nails. Dust all the blue nails with the glitter.
Step 4: Apply Top Coat
Now apply your top coat. Make sure the paint is completely dry before adding top coat.
Gel Polish: Apply top coat to all the nails and cure in UV light for 2 minutes.
Step 5: Paint Flowers
I painted three white flowers on the ring fingers and 2 flowers on the thumb nails, similar to my Spring has Sprung nails. Here is the secret. . . when hand painting images on your nails use acrylic craft paints, not polish. You will get crisper lines and much more pop than you would with polish. Some polishes can sometimes dry almost transparent which makes the image hazy and you won’t get the wow factor you are going for. BUT if you are nail stamping you have to use polish.
To paint these flowers you basically paint little triangles for each of the petals and then a big dot in the center. (View the image below; Paint a V then fill in.) Do as many petals as you like.
Shellac: Do just the same as above.
Step 6: Apply Final Top Coat
Now apply your top coat. Make sure the paint is completely dry before adding top coat to help avoid smearing.
Shellac: Apply top coat, only after paint is completely dry, and cure in UV light for 2 minutes.
Step 7: Allow to Dry and Apply Cuticle Oil
Allow your polish to dry completely. Apply a cuticle oil just around your nails on the cuticle and rub into the skin.
Gel Polish: Remove sticky residue on top of nails with a little alcohol or polish remover and apply cuticle oil.
Remove gel polish after 2-3 weeks, check out Gel Polish Removal for the quickest, easiest and best way to remove gels.


