
Also Featured on Double Diamond Hill Ranch
Anyone that knows me, knows that I LOVE moose! Ok, maybe I’m a bit of a moose fanatic. How could I not be?!?! I seem to see them on most outdoor adventures we go on. They seem to sense that I am a friend and just have to come out to be seen. Really.
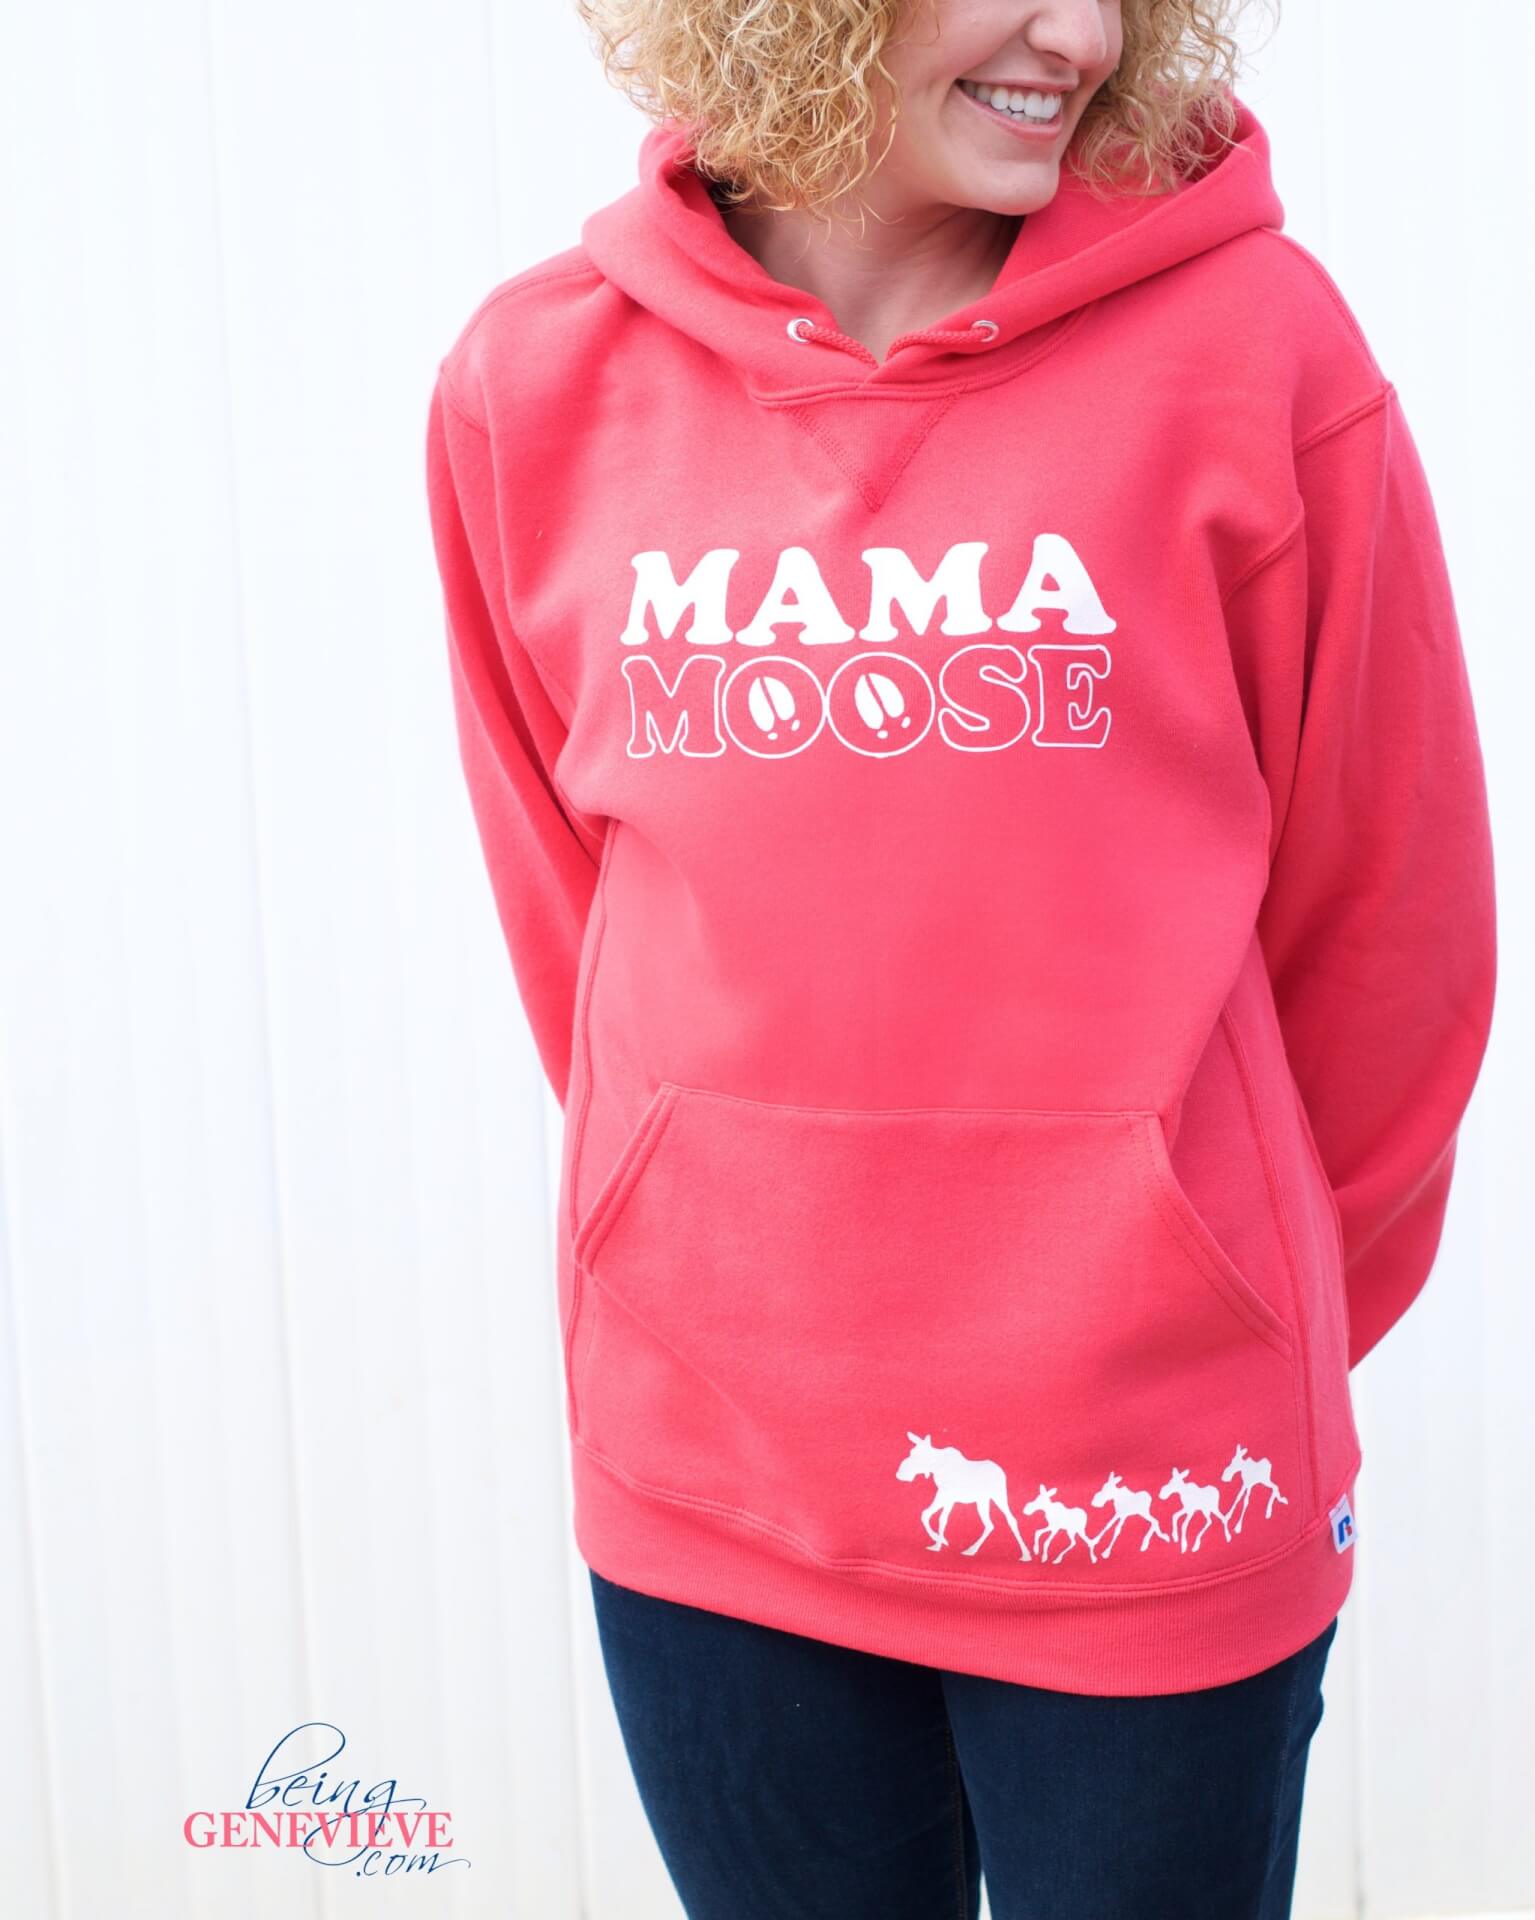
Lately, I have been seeing “mama bear” items everywhere; shirts, bumper stickers, home decor. So I decided I would take a little bit of a twist to the items I’ve seen and make myself a mama moose hoodie.
Step 1: Purchase Hoodie
I first bought a bright pink, very comfortable hoodie. I then went to work designing what I wanted my mama moose image to look like. I ended up putting moose hoof prints in the center of the o’s at the last minute, as a suggestion from my husband. I just love how it turned out! I also wanted to put something on the hoodie showing my little herd. I ended up designing a mama moose with four little calves (to represent my four little boys) following her. I placed this on the bottom-side of the front pocket as a little something extra. This helped customize the hoodie to me.
Note: I took pictures of the entire process, but just upgraded my phone and can’t seem to find any of them. SORRY! Luckily it’s the exact same procedure as my Disneyland Shirts.
Step 2: Template
Now create your template. You can use freezer paper or vinyl like I do. I measured the front of the shirt just as I did for my Disneyland Shirts and subtracted 7″ to get the image width of 9″. (From the arm seam to the other arm seam it was 16″. I then subtracted 7″, to get the length of 9″.)
Mama Moose SVG


For the mama moose and calves, I decided I wanted them to not quite reach the middle of the hoodie pocket. I measured and came up with the length of 7″.
Mama Moose & Calves SVG

Now place the template on the hoodie. If using freezer paper, iron it into place. If using vinyl, stick it on using this method with tacky spray. I also have a video here that shows how I do it using another shirt I made.
Step 3: Paint/Screen Print
I then used my favorite screen printing paint and just painted it on with a paint brush. Do it thick enough that you can’t see the shirt color from behind, but don’t do it too thick that it will just peel off later.
Allow to dry for about 12-24 hours.
Step 4: Heat Seal
When completely dry, peel off template. Place a thin piece of scrap fabric over the image and heat set the paint with a hot iron. (Just as I did here.)
Now it’s ready to be worn, washed, dried, just whatever and it should hold up better than a store bought screen printed shirt. Really.


