
I was looking over some of my past posts and I noticed I never posted about how I antique painted and stained our farmhouse dining table. Here is what I did . . .
Supplies:
- Pre-Stain Wood Conditioner
- Red Chestnut Stain
- Red Oak Stain
- Gloss White Paint
- Gloss Urethane
- Foam Brushes
- Plastic Gloves
- Bristle Brush
- Old Towel (for wiping excess stain off)
Before you begin staining, remember to sand your entire project very well. Also remember to use a slightly moistened cloth to wipe down and clean off all the sawdust and dirt. You want to start with a very clean smooth surface.
Antique Paint Technique
Begin by doing a pre-stain wood conditioner on the wood you will be staining. (I think, sorry can’t remember, you only wait about 10 minutes before you can apply your stain, so do this right before your stain. Don’t apply the day before or anything like that. Read the instructions on the can.) I have never done this before, but loved the even results it gave me. I will never leave out this step again when it comes to staining.

This is how the legs looked with the stain just applied; I hadn’t wiped off the excess yet.
First, I stained all of the legs and apron of the table with 1 coat of red chestnut, let sit about 5-10 minutes before wiping excess stain off. Once dry (about 4 hours), stain with 1 coat of red oak stain. Allow to sit 5-10 minutes and wipe off stain. Allow to fully dry before moving on.
Now you will paint everything with 1 heavy coat of standard white gloss paint.

Note: I opted for white gloss so I wouldn’t have to go back and seal the paint with a urethane. First, going back and sealing everything is a pain. Second, most urethanes claim to be non-yellowing, but to me it always seems to yellow just slightly. I definitely didn’t want a yellow farmhouse table.
Since you are painting just 1 coat of the white paint, the dark stain will show through a little bit in areas. This is what you want. It will help give it a more antique older look. You may notice a few spots that need another light coat of paint, such as my turned legs needed another light coat.

1 Coat White Gloss Paint

After the second, light coat of White Paint
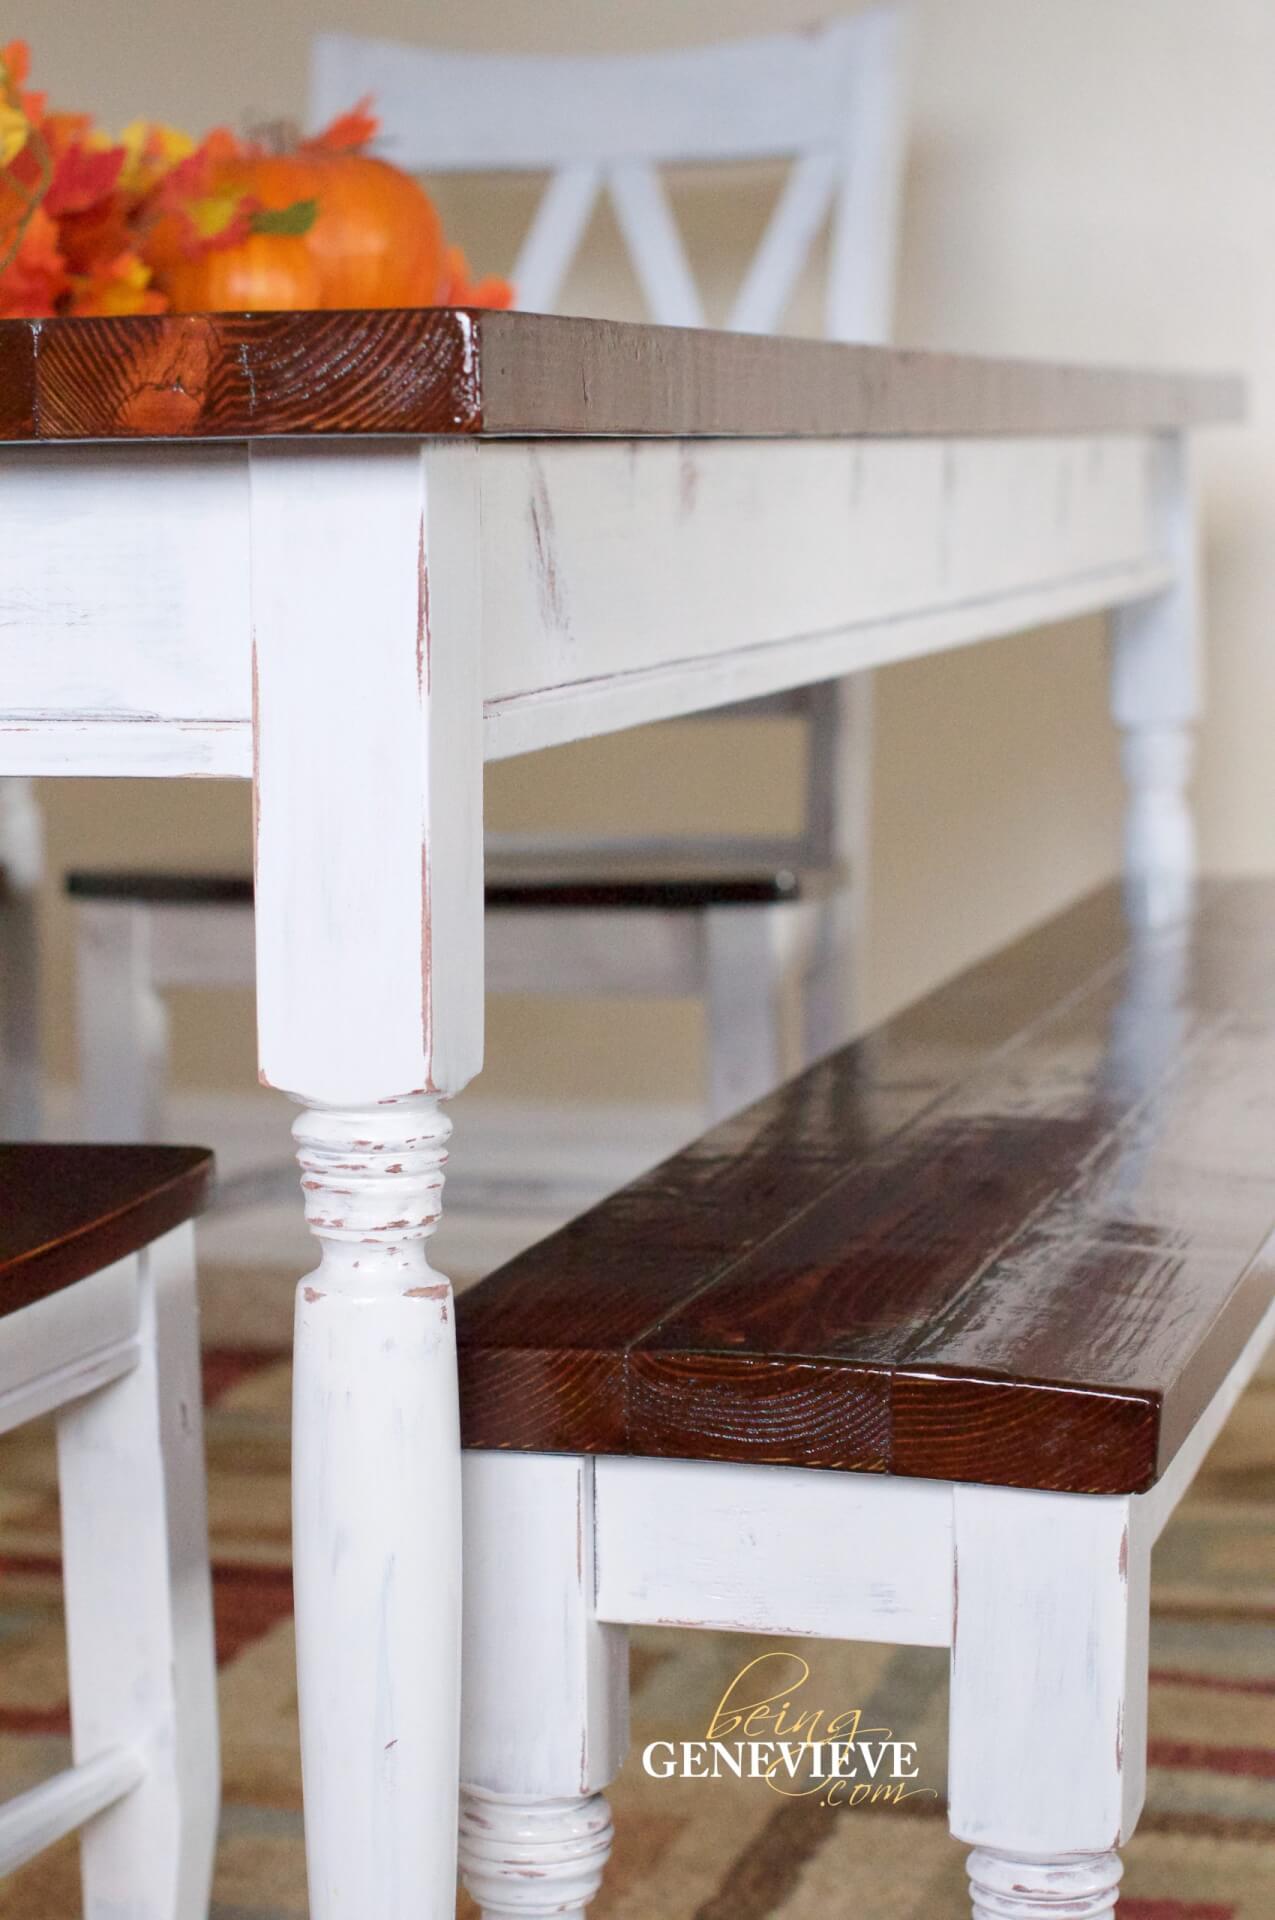
Once it dries completely (I think I waited at least 24 hours), now comes the fun part: distressing! Grab some sandpaper and begin roughing up corners, knots, imperfections, and the turned legs of the table. Now don’t go to crazy because you want to take off the white paint, but not the underlying stain color. When you distress the paint you want that deep rich color to be exposed underneath.

Distress the turned legs

Distress all the knots.

Distress all the imperfections in the wood

Farmhouse Stained Tabletop
Begin by doing a pre-stain wood conditioner on the wood you will be staining.
For the planked farmhouse tabletop, you will begin by staining with 1 coat of red chestnut, let sit about 5-10 minutes before wiping excess stain off.

1 Coat of Red Chestnut Stain

1 Coat of Red Chestnut
Once dry (about 4 hours), stain with 1 coat of red oak stain. Allow to sit 5-10 minutes and wipe off stain.

First Coat of Red Oak Stain
Repeat the red oak stain 2 more times. So you have 1 coat red chestnut and 3 coats of red oak stain by the end. Allow to fully dry between each coat.

1 Coat of Red Chestnut and 3 Coats of Red Oak
Now I applied a silicone in the cracks because that is what Ana White recommended, but I don’t recommend doing this. It didn’t dry clear and I’m very unhappy with the final look of it. It could be that I didn’t wait a week before applying the urethane. After I finished, I did a little research and professionals claim it can take a week to fully dry. It needs the moisture in the air to fully dry. So I either sealed it too soon (I waited 48 hours) and it didn’t cure correctly or it just doesn’t dry clear on wood. Not sure. Also, the urethane doesn’t stick very well to it. I have a few places where my kids have picked off the urethane that was on top of the silicone. Whenever I mention the cloudy silicone to others they claim they didn’t even notice, but I do. I would skip this step or silicone it maybe after the final urethane step. I’m sorry, I’m not sure what to tell you to do here. I guess the upside is, I never have to clean food out of the cracks or have spilled drinks run through the table onto the floor.

Finally, I applied 6 coats of gloss oil-based urethane, letting it dry for at least 6 hours in between each coat and lightly sanding with 220 grit sandpaper before applying each coat. Looking back, I probably could have just done 4 coats, but I wanted to make sure it was very smooth and glossy (and it certainly is). Note: I used a foam brush for the urethane, but if I were to do it again I would use a bristle brush. I did on my faux wood door and I feel like the urethane is applied more evenly and the final finish looks better.

Ooooooo, I love a beautiful wood grain and look how beautiful this is with that satin color.

Note: I love the double X back chairs, that I bought unfinished, to go with the table. I just stained and painted them the same way I did the table.


